Customer Portal Quick Start Guide
Welcome!
Welcome to your Customer Portal! Here, you can request projects, check quotes and orders,
download documents, and provide feedback—all in one place!
• URL: Type lingvohouse.plunet.com into your browser.
• Login: Enter your username and password.
• Forgot Password?: Click on “Forgot your password?” or contact the
admin if you’re locked out.
Navigating the Portal
• Main areas: Tabs (main menus), Menus, and Submenus.
• Access: Depends on your user rights and enabled features.
Action bar
This bar at the top of the page gives you quick access to various functions
Changing the language
Click on the language code in the top right corner to switch the interface language.
User Menu
• Settings: Change your password and display settings.
• Info: Find useful documents and links.
• About Plunet: Get software information.
• Logout: Log out when you’re done.
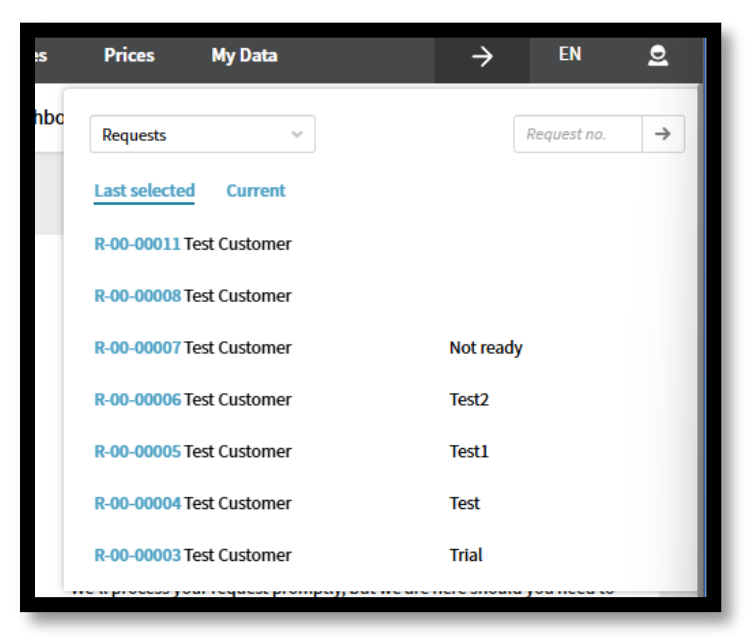
The switch button
• Easily switch between different data
records and projects.
• Switch within the same area or move to a different one.
• View your recent and current projects.

Home Menu and Dashboard overview
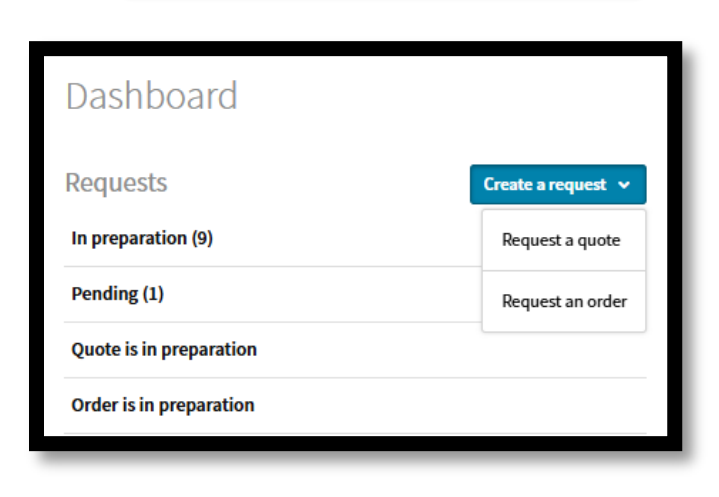
• First look: See your requests, quotes, orders, and invoices.
• Home Menu: Access the Dashboard and customize settings
like password and time zone.
Making Requests
Create a Request:
Choose “Quote” if you require price upfront. For contract and
subscription customers, select “Order”.

Customer Portal - Making requests
Creating requests in your Customer Portal is simple and intuitive. Here’s a step-by-step guide to help you
through the process:
Create a request:
o On the dashboard, click Create a request.
o Choose whether you want to Request a quote or Request an order.
o Choose “Quote” if you require price upfront. For contract and subscription customers,
select “Order”
Step 1: General info:
o Request number: This is an automatically generated number. You can use this number in
your subject line when you email us.
o Project name: Enter a name for your project.
o Description/Message: Enter project specifications, instructions, or other info.
o Reference number: If you have an internal reference number for your project, enter it
here.
o Scope of service: Select the services you need.
o Service description: You can find a description of the service by choosing it.

o Project announcement – Check this box to let us know this is an upcoming project not yet
confirmed.
o Requested delivery date: Set your desired delivery date. Once we review your project
requirements, we’ll advise if your chosen deadline isn’t feasible.
o Properties:
▪ Industry sectors: Set the right industry sector for your project.
▪ Use of AI: Indicate your preference. Note that certain services, such as MTPE,
inherently involve AI.
▪ Add-ons: Choose any additional service you may need (if not already included in
the service chosen).
▪ Certification options: Choose the type of certification you need.
▪ Rush turnaround options: If you need a rush delivery. choose the turnaround
option best suited for you.
o Tip: You can copy existing requests and modify them to save time if you have similar
requirements frequently.
o Note: All fields with an asterisk (*) are mandatory.
Step 2: Language details:
o Source and target languages: Select the languages for your project.
▪ Click the Add button to add the languages.
o Alternate delivery dates: If needed, specify different delivery dates for different language
combinations.
o Different source files: Ifthere are different source files for each language, check the
corresponding box. This creates a sub-folder for each language combination in the project
folder.
o Note: To proceed, you need at least one language combination.
Step 3: Upload files:
o Use Filemanager to upload your source files and any reference materials.
o You can also drag and drop files directly into Filemanager.
o Note: You should have pop-ups enabled to view the Filemanager window.
Step 4: Review & submit:
o Summary: Review all the information you’ve entered.
o Edit: Hover over a section and click the Edit button to make changes. Save or discard
changes as needed.
o Confirmation email: Enter your email address to receive a confirmation of your request.
o Submit:
▪ If requesting a quote, click Request a quote.
▪ If placing an order, click Request an order.
o You will receive a confirmation email.
You’re all set! We’ll process your request promptly
Handling Quotes
• Getting quotes: Quotes are sent to you via email.
• Decide: Accept or reject quotes through email or the Dashboard.
• Details: View quote details before making a decision.
• Compare: Compare different quote versions if you have them.
Managing Orders
• Confirmation of your orders: You’ll get an email confirmation for orders.
• Delivery: Download files from FileManager.
• Feedback: Provide feedback on completed orders if you have permission.
Viewing Invoices
• Find invoices: Check the Invoices section.
• Export: Export your invoices to Excel (CSV) if needed.
Checking Prices
Price lists: View prices for different language combinations.
My Data section
Admin tasks: Manage your company’s details and contacts.
User accounts: Activate, block, or delete user accounts.
Rights: Assign and manage user rights for your team.
This Quick Start Guide helps you navigate the customer portal with ease. For more detailed
information, refer to the Full User Guide. Enjoy using the portal

